REVIEW · KATHMANDU
Mardi Himal Trek
Book on Viator →Operated by Mission Himalaya Trekking · Bookable on Viator
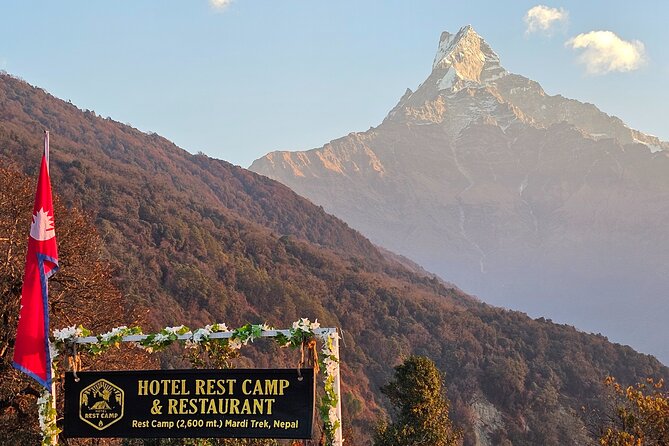
Big Himalayan payoff, without big technical skills. The Mardi Himal Trek is interesting because it’s designed for first-timers who still want a real trek-to-the-top feeling, with standout Mardi Base Camp viewpoints over the Annapurna Massif and Mount Machhapuchhre. I also like how smoothly the day-to-day plan supports hiking confidence, with clear stages and a trained guide team. The catch is that altitude and weather can still make certain days feel long, even on a beginner-friendly route.
If you want less hassle and more hiking time, this itinerary leans into that. You get private transfers, domestic flights, permits (ACAP and TIMS), lodge stays, and a licensed trekking guide plus a strong porter crew. I’d mainly flag one consideration: you’ll pay more than a DIY trek, but you’re buying the logistics, the required paperwork, and the hard-to-organize pieces that keep your days simple.
In This Review
- Key Highlights You’ll Feel on This Trek
- Why Mardi Himal Is a Great Fit for First-Timers and Repeat Hikers
- Getting Started in Kathmandu: Rest, Rooms, and a Plan You Don’t Have to Guess
- The Flight to Pokhara and the Drive to Kande: The Start That Feels Like Momentum
- Deurali to Forest Camp: Woodland Trekking and Your First Real Altitude Test
- Forest Camp and Low Camp: Mixed Woodland Walking Above 3,000m
- The Acclimatization Day Above 3,000m: Shorter, Smarter, and Worth It
- The Mardi Base Camp Push: The View That Makes People Tear Up
- Descending to Sidhing: Getting Your Legs Back Without Losing the Magic
- The Lwangghale Day: Flat(er) Walking Through Villages and Tea Garden Mornings
- Pokhara Recovery: Waterfalls, Temples, and a Guided City Reset
- Kathmandu Finale: Town Guide Time and Cultural Windows
- Price and Value: What You’re Paying For (and What You’re Not)
- Lodges, Meals, and Daily Rhythm: What Your Days Actually Feel Like
- Gear, Cold Weather, and the Knee Test You Don’t Want to Fail
- Who Should Book This Trek (and Who Might Want a Different Option)
- Should You Book Mardi Himal With Mission Himalaya Trekking?
- FAQ
- How long is the Mardi Himal Trek?
- Where does the trek start and end?
- What’s included in the trek price?
- What permits do I need for the trek?
- What gear is provided?
- Are meals included?
- Can I cancel for a refund?
Key Highlights You’ll Feel on This Trek
- Beginner-friendly trail flow from Phedi toward Deurali, Forest Camp, and High Camp, without technical climbing
- Mardi Base Camp as the emotional peak at around 4,500m, where the views are the reward for the effort
- Acclimatization built into the schedule with shorter trekking days once you’re above 3,000m
- Rhododendron season potential when spring brings colorful woodland walking (timing matters)
- Strong guide-and-porter support that shows up in day-to-day pacing and troubleshooting
- Pokhara reset days with tea gardens and guided sightseeing after the mountains
Why Mardi Himal Is a Great Fit for First-Timers and Repeat Hikers
Mardi Himal sits in Nepal’s western trekking region, and it has a reputation for being approachable. That doesn’t mean it’s easy. It means the trail doesn’t demand technical skills. You’re mostly managing your own pace, your breathing, and the altitude.
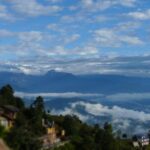
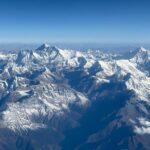
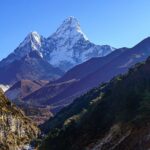
What I like about the route is how it earns its big payoff. You don’t jump straight into the scariest section. You build up gradually through places like Deurali village, then into the forests around Forest Camp and higher camps. The trek’s highlight is reaching Mardi Base Camp at about 4,500m, with panoramic views over the Annapurna region and Mount Machhapuchhre. That’s the moment most hikers remember: the kind of view that makes you stop walking just to take it in.
One more practical reason this trek works well: the schedule includes built-in time for altitude adjustment, especially once you’re above 3,000m. You’ll do shorter days designed to keep you safer and less wrecked.
You can also read our reviews of more hiking tours in Kathmandu


Getting Started in Kathmandu: Rest, Rooms, and a Plan You Don’t Have to Guess
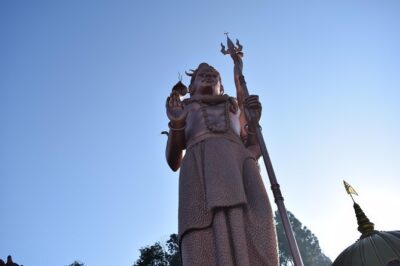
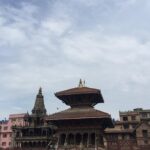
Your trip begins in Kathmandu, after you handle entry authorization at the airport. From there, a team member or your tour leader meets you and drives you to Thamel, the area where many trekkers reset before heading out.
I like this first-night setup because it lowers friction. You’re not trying to solve transportation, timing, or where to sleep after a long flight. You’re also covered on the hotel side: the package includes 3-star accommodation in Kathmandu with breakfast.
Realistically, Kathmandu is a useful buffer day. Between jet lag and getting organized, a calm arrival matters. You’ll use the time to rest, check your packing, and mentally prepare for the next step: getting to Pokhara and starting the hike.
The Flight to Pokhara and the Drive to Kande: The Start That Feels Like Momentum
The next morning you catch an early domestic flight from Kathmandu to Pokhara. Then you drive to Kande, which is where the hiking approach begins for the day.
This matters more than people think. Starting with a flight and a short drive saves you from spending your first day wrestling with long overland travel. And because the hiking routes are described as starting relatively easy and gradually building, that first hiking day feels like orientation, not punishment.
Plan to treat Day 2 like a warm-up. You’re not out to set records. You’re out to get used to the rhythm: small climbs, steady steps, and keeping your hydration going.
Deurali to Forest Camp: Woodland Trekking and Your First Real Altitude Test
On the way up, you’ll pass through Deurali village and head toward Forest Camp. The plan includes a “hearty mountain meal” at Deurali before you tackle the climb.
This is one of those legs where the trail personality becomes clear. Early on you get a more human-scale feel—village life, lodge stops, and then the shift into the forested walking. You’ll spend about 6 hours hiking on this day, so it’s long enough to feel like a trek but not so long that you’re destroyed on day one of actual climbing.
Altitude starts to matter here. Even when the trail is straightforward, you’ll notice the air and adjust your pace without panic. If you tend to go too fast when you feel okay, this is where you learn the wiser habit of slower, steadier movement.
Forest Camp and Low Camp: Mixed Woodland Walking Above 3,000m
Once you’re above 3,000 meters, your distance may shrink slightly. That’s not a weakness in the plan—it’s altitude management.
After breakfast, the hiking moves through mixed woodland, with lunch at Low Camp. Expect around 5 hours on the trail. This leg is less about speed and more about comfort: consistent footing, fewer wild surges in effort, and enough time to keep your breathing controlled.
This is also where rhododendron season can show itself. In spring, these mountain forests can look almost painted with pink and red blooms. Even outside peak season, the forest atmosphere makes the walking feel calmer than exposed ridgelines.
A small caution: woodland routes can still get muddy. Your trekking poles are worth their weight here, even if the trail looks gentle.


The Acclimatization Day Above 3,000m: Shorter, Smarter, and Worth It
At this stage, you’ll do shorter trekking segments to help your body adjust. The itinerary specifically encourages good hydration to reduce altitude sickness risk.
You’re likely still feeling the effects of the climb even if your legs are okay. That’s why the plan gives you less time on the trail on certain days. It’s a trade: you give up a little “distance traveled,” and you gain a much better chance of enjoying the high point without feeling like you’re scraping by.
I’d treat this as a day for calm habits:
- Keep water intake steady.
- Eat what’s offered at the lodge meals.
- Don’t over-schedule yourself with extra detours.
On a trek like this, you don’t “win” by pushing too hard early. You win by arriving at the base camp section feeling ready for the emotional payoff.
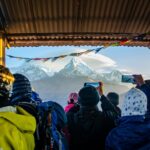
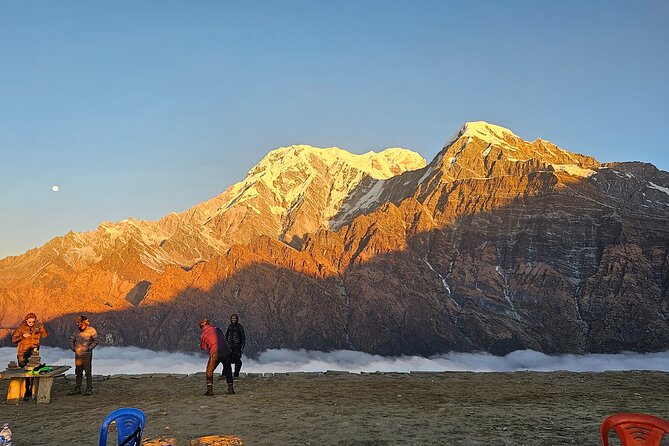
The Mardi Base Camp Push: The View That Makes People Tear Up
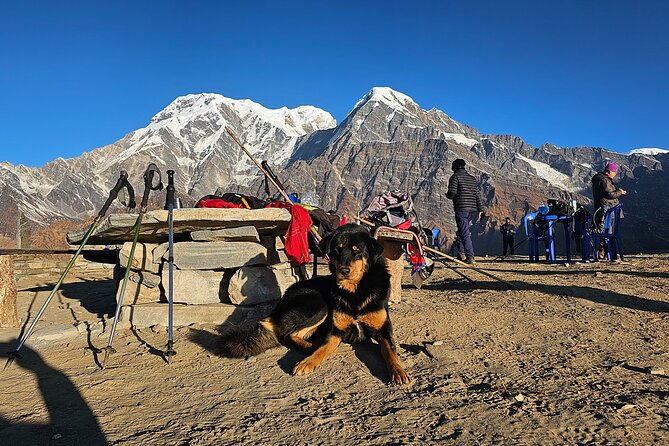
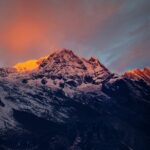
This is the main event. After breakfast, you continue trekking toward Mardi Himal Base Camp. The plan includes a viewpoint with panoramic vistas along the way, then the big finish at the base camp area.
The trek time on this day is about 7 hours, and it’s described as the most exhilarating part—often linked with tears of joy and accomplishment. I get that reaction. On treks, the hardest part isn’t always the physical climb; it’s the waiting for the reward. Base camp delivers that reward all at once: big sky, steep mountains, and a sense that you really did earn the view.
What to watch: this is where weather can change your experience fast. Wind and cold are real at these elevations. The package helps with gear—down jacket, sleeping bag, and a duffel bag are available on request (and you return them after the trek). That support is valuable because cold gear mistakes are expensive in discomfort.
Descending to Sidhing: Getting Your Legs Back Without Losing the Magic
After the base camp day, you head downward toward Sidding (Sidhing). The route starts with an alpine breakfast at a higher elevation before you descend.
The trail includes rhododendron and pine areas early on. That’s a nice change of scenery: you’re not only going down, you’re walking through different types of mountain vegetation.
The hiking time is about 6 hours. This can still feel tiring because descending is rough on knees. If you’re a careful hiker, you’ll probably feel okay. If you have a tendency to let gravity do the work, you may regret it later.
Simple trick: keep your steps short and controlled. Let your muscles catch the load instead of your joints.
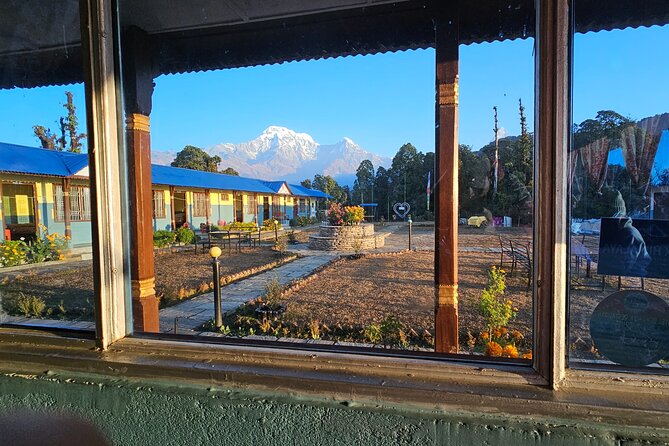
The Lwangghale Day: Flat(er) Walking Through Villages and Tea Garden Mornings
One of the itinerary’s best surprises is how the later portion shifts into a more gentle pace. The day toward Lwangghale is often described as a highlight because much of it is mostly flat terrain, plus you’ll pass through village areas like Lwong with old houses.
This is where the trek stops feeling purely like a climb and starts feeling like moving through a living place. You’re still in the mountains, but you’re interacting with human-scale moments—homes, local food rhythms, and lodge life.
Then the next day begins with an early morning walk through tea gardens around Lwong. You’ll catch sunrise scenery before returning to the guesthouse. That tea garden sunrise is a perfect emotional landing after high-altitude trekking: you wake up to color and calm instead of cold ridgelines.
Pokhara Recovery: Waterfalls, Temples, and a Guided City Reset
After finishing the hiking portion, you return to Pokhara. You’re scheduled for a final hiking-adjacent day that’s more about recovery and enjoying the city pace than logging distance.
In Pokhara, you get guided tours to attractions including Davis Waterfall and Gupteswor Mahadev. I like that the tour gives you structure after the trek, because Pokhara can be busy and spread out. Having someone coordinate makes it easier to see the highlights without wasting time.
Your Pokhara hotel stays are also covered (3-star with breakfast), which helps you avoid the trap of thinking you can “wing it” after a mountain week.
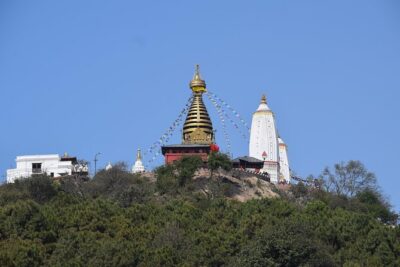
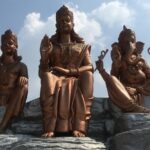
Kathmandu Finale: Town Guide Time and Cultural Windows
On the last day, you fly back to Kathmandu and spend time with a town guide exploring popular destinations.
Even though specific sights aren’t listed here, the value is clear: you don’t end on a blank slate. After days of trail logistics, you get a guided cultural window where you can ask questions, get context, and move at a normal pace.
You also finish back at the meeting point area in Thamel.
Price and Value: What You’re Paying For (and What You’re Not)
At $1,058 per person for an approximately 11-day trek, this isn’t a bargain like a bare-bones DIY plan. But it isn’t trying to be.
Here’s what you are paying for, and why it matters:
- Permits: ACAP and TIMS are included.
- Domestic flight: Kathmandu to Pokhara and back, including the guide.
- Private vehicle transfers for sightseeing plus airport/city moves.
- Hotels: 3-star accommodation in Kathmandu and Pokhara with breakfast.
- Trekking support: a government-licensed trekking guide with meals, accommodation, and insurance, plus a porter with meals, accommodation, salary, and insurance.
- Lodge stays: on the trek in best-available lodges, twin sharing.
- Gear on request: down jacket, sleeping bag, and duffel bag.
What’s not included is also important:
- Your international flights and Nepal visa fees.
- Travel and rescue insurance.
- Meals in Kathmandu and Pokhara besides what’s listed.
- Drinks, WiFi, and hot showers (if available), plus tipping for staff.
So the value equation comes down to this: if you want the required paperwork handled, transport solved, and a trained team managing the difficult bits, this price can feel fair. If you prefer a DIY approach and you already know how to line up permits, guides, and flights, you could build something cheaper. But the cheaper plan often costs you time, stress, or the wrong packing choices.
Lodges, Meals, and Daily Rhythm: What Your Days Actually Feel Like
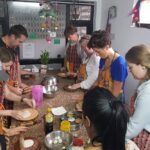
On the trail, you’ll sleep in lodges using twin sharing. Meals are included for trekking days: the plan lists 10 breakfasts, 8 lunches, and 8 dinners.
This matters because high-altitude trekking punishes decision fatigue. If you have to figure out food every day, you lose energy. Instead, your schedule stays predictable. You eat, you hike, you rest, you repeat.
One more useful note: while the package covers many meals, personal extras like drinks and certain lodge upgrades aren’t included. Also, if you decide to return earlier from the trek, costs are not refundable. That doesn’t mean you’ll regret the decision; it just means you should go into the hike with realistic expectations about altitude and weather.
Gear, Cold Weather, and the Knee Test You Don’t Want to Fail
Even though this trek is considered suitable for beginners, you should treat it like a mountain trip, not a stroll.
Gear support is included: you can request a down jacket, sleeping bag, and duffel bag during the trek. Still, bring warm layers suited for cold nights and wind. At higher elevations, the temperature drop can surprise you.
Also, be ready for the knee stress of descending. The route includes descents like the leg into Sidhing. Plan on using trekking poles and taking it slow downhills. Your future self will thank you in Pokhara.
Who Should Book This Trek (and Who Might Want a Different Option)
This trek fits well if you:
- Want Himalaya views without technical climbing
- Prefer an organized plan with permits, flights, and guide/porter support
- Have moderate physical fitness and can handle long days on foot
- Are okay with lodge sleeping and basic mountain comforts
You might want a different route if you:
- Have serious mobility limits and need a very short trekking profile
- Hate cold weather surprises and don’t like managing altitude risk
- Want a no-frills budget trip without guides and structured transfers
Should You Book Mardi Himal With Mission Himalaya Trekking?
Yes, you should book if you value a guided, logistics-covered trek that still delivers a true mountain climax. This is a route where the big payoff is tied directly to effort: reaching base camp near 4,500m and taking in the Annapurna/Machhapuchhre views.
Also, based on the consistent praise in feedback for team members like Birendra (and other guides referenced such as Bikas and Dawa), you’re likely to get practical support on pacing, route adjustments, and the small things that keep a trek smooth when conditions get rough.
My final advice: pack for cold, hike your own pace, and treat the acclimatization days as part of the win. If you do that, the Mardi Himal Trek feels like exactly the kind of mountain experience that leaves you smiling on the ride back to Pokhara.
FAQ
How long is the Mardi Himal Trek?
It’s listed as approximately 11 days.
Where does the trek start and end?
The meeting point is Mission Himalaya Treks and Expeditions in Thamel, Kathmandu. The activity ends back at the meeting point.
What’s included in the trek price?
The package includes Kathmandu and Pokhara accommodation (3-star with breakfast), domestic flights Kathmandu–Pokhara–Kathmandu (including for the guide), permits (ACAP and TIMS), a licensed trekking guide with meals and insurance, a porter with meals and insurance, lodge accommodation on the trek (twin sharing), and trekking meals (breakfast, lunch, dinner as listed). Ground transfers are also included via private vehicle for airport and city transfers.
What permits do I need for the trek?
The required permits are included: ACAP and TIMS.
What gear is provided?
Down jacket, sleeping bag, and duffel bag are available on request (and returned after the trek).
Are meals included?
Yes on the trek: breakfast (10), lunch (8), and dinner (8) are included as listed. Meals in Kathmandu and Pokhara are not included except the items specified.
Can I cancel for a refund?
Yes. Free cancellation is available up to 24 hours in advance for a full refund. If you cancel less than 24 hours before the start time, the amount paid is not refunded.