REVIEW · KATHMANDU
Everest Base Camp Trek
Book on Viator →Operated by Nepal High Trek & Expedition Pvt. Ltd · Bookable on Viator
Everest starts with a tiny flight. This trek turns that first step into a stress-free plan: you’re met in Kathmandu, then handled through the Kathmandu–Lukla–Kathmandu flights so you can focus on getting your legs ready. What I really like is how the route mixes big mountain drama with real Sherpa towns—Namche, Tengboche, Dingboche—so it feels like a journey, not just a staircase to altitude.
My second favorite part is the built-in rhythm for altitude—especially the time in Dingboche—so you’re not rushing your body. And when the trek finally asks for full effort, you’re rewarded with the classic early climb to Kalapatthar for the Everest-area panorama. One possible drawback: you still need to budget for things not included (especially travel/rescue insurance and tipping), and weather can affect flight timing, which means you should stay flexible.
In This Review
- Key points worth knowing before you go
- Day 1 in Kathmandu: meeting your team and settling in for thin air
- Day 2 Lukla flight: the quick jump that shapes your whole trek
- Day 3 Phakding to Namche Bazaar: suspension bridges and your first big views
- Day 4 Namche Bazaar exploration: a real rest day for a reason
- Day 5 Tengboche Gompa: monasteries, mountain angles, and crisp morning air
- Day 6 short Tengboche visit, then Dingboche viewpoint day
- Day 7 Dingboche acclimatization: Chhukung hike to help your breathing
- Day 8 Khumbu Glacier lateral moraine: memorials and the heavier feel of the day
- Day 9 Everest Base Camp approach: Gorak Shep first, then the base camp trail
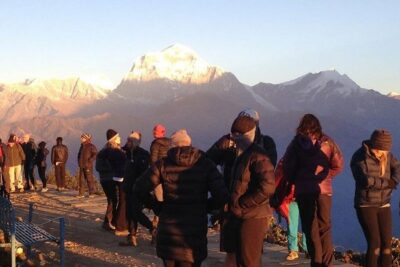
- Day 10 Kalapatthar: the long early climb that pays off hard
- Day 11 Pheriche to Pangboche: Orsho, then the oldest monastery stop
- Day 12 Return toward Lukla: easier walking, but still not a free day
- Day 13 Kathmandu sightseeing: Durbar Square and a final mountain mindset shift
- Day 14 final farewell and TIA timing
- Price and value: what $1,799.27 covers (and why the totals can surprise you)
- Fitness, weather, and the one drawback you can’t wish away
- Should you book this Everest Base Camp trek?
- FAQ
- How long is the Everest Base Camp trek?
- What is the meeting time?
- Are flights between Kathmandu and Lukla included?
- What gear is provided?
- Are meals included?
- Does the price include permits and park fees?
- Is emergency evacuation included?
- Is Kathmandu lodging included?
Key points worth knowing before you go

- Included flights (Kathmandu ↔ Lukla) help you avoid the biggest headache of EBC planning.
- Gear is provided (sleeping bag, down jacket, duffel), which makes packing simpler for your flight to Nepal.
- Acclimatization is built in with a Dingboche stop and a hike toward Chhukung.
- You’ll get culture stops, including Tengboche and Pangboche monastery visits.
- Your itinerary includes both Everest Base Camp and a Kalapatthar viewpoint day, so you see the region from multiple angles.
- Emergency helicopter is arranged via insurance, not as a free service, so your policy matters.
Day 1 in Kathmandu: meeting your team and settling in for thin air
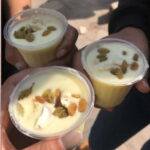
Your trek officially starts after you land in Kathmandu (TIA). A Nepal High Trek & Expedition team representative, listed as Anjan, meets you and brings you to your Kathmandu hotel. After that, you’ll have dinner the first night—enough time to eat well and get an early night before the plan turns into mountains.
This first day matters more than it sounds. Kathmandu traffic and jet lag can wreck your energy. Having pickup handled, plus a real dinner on the calendar, helps you start the trek with steadier focus. It also means you’re not scrambling for gear or transport after a long day of travel.
One small practical note: Kathmandu hotel nights aren’t included in the package you’re buying, so factor that into your total budget. (You’ll still get airport pickup and drop.)
You can also read our reviews of more hiking tours in Kathmandu


Day 2 Lukla flight: the quick jump that shapes your whole trek
The next morning, you transfer to the domestic terminal for your flight to Lukla, the launch point for the Everest region trek. This day is short on hiking but big on planning: you’ll want to keep your clothing and essentials easy to reach, because once you’re on the trail, you won’t want to unpack half your bag every time the temperature shifts.
Why I consider this a win for you: the tour includes both way flights (KTM–Lukla–KTM) and the transfers to catch them. That removes one of the most common sources of trek stress—missing a connection because of taxi timing, check-in lines, or a last-minute confusion about where you need to be.
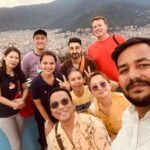
Also, the trek is described as private, meaning it’s only your group. That can feel more organized (less chaos, less waiting), but it also means your group’s pace and comfort are the system—so bring a realistic attitude about slowing down for altitude.
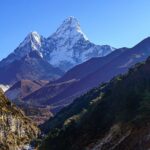
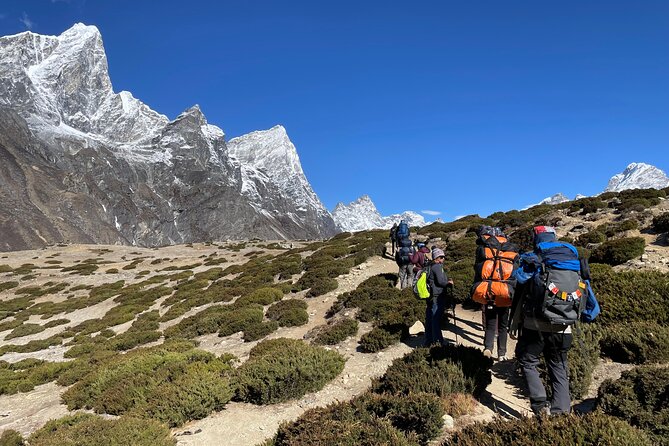
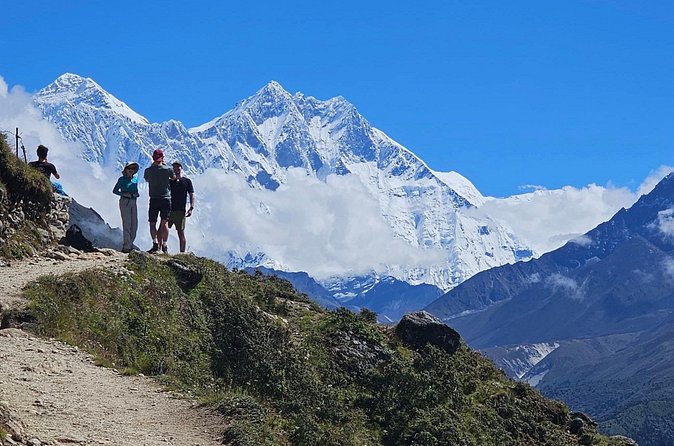
Day 3 Phakding to Namche Bazaar: suspension bridges and your first big views
From Phakding, the trek climbs toward Namche Bazaar. You’ll cross suspension bridges over the Dudh Koshi River, and the route gives you that early taste of Everest-area scale. You may catch views of peaks like Mt. Thamserku along the way, which is a great reminder that you’re moving through real terrain, not just walking between lodges.
This day is often where you decide what kind of trek you’re going to have. If you go out too fast, you’ll pay for it later. The trek’s style here is gradual: you’ll walk slowly enough to enjoy the views and settle into a steady breathing rhythm. For many first-timers, this is the day that teaches you how to pace.
Drawback to keep in mind: suspension bridges add a little mental intensity—gusty wind and shaky steps are part of the experience. You’ll feel it more if you’re anxious on bridges, so consider bringing trekking poles and using them for balance.
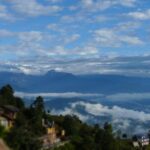
Day 4 Namche Bazaar exploration: a real rest day for a reason
Once you reach Namche Bazaar, you spend most of the day exploring the surrounding area. Namche is the main hub for the Everest region, with the usual comforts you need during a trek: ATMs, banks, and internet cafés are specifically mentioned in the plan.
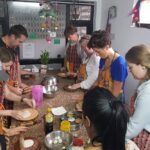
This is not a wasted day. It’s where you refill supplies, adjust your clothing system, and get your bearings. It’s also a cultural reset: you’ll see how everyday life looks in the mountains—shops, guesthouses, and the constant flow of people moving up and down the Khumbu.
If you’re a sun-on-skin person, this is also the day to fix that habit. High-altitude sun can surprise you, even when the air feels cold. Plan to use sunscreen daily, and don’t wait until you feel heat.
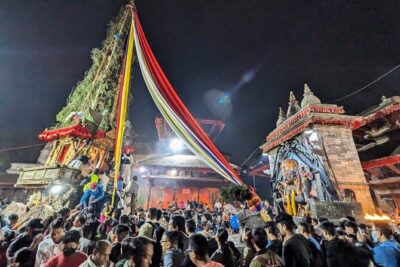
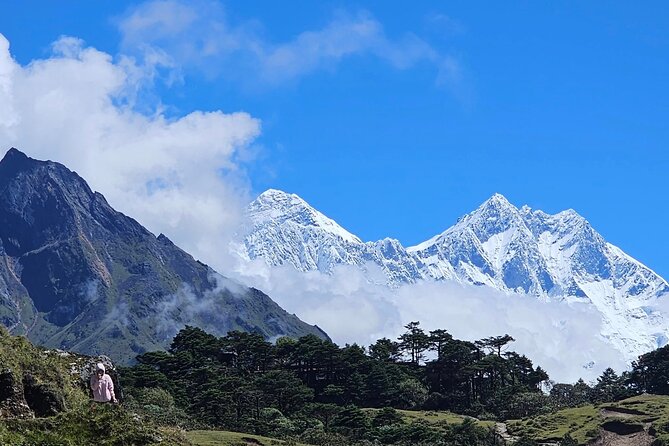
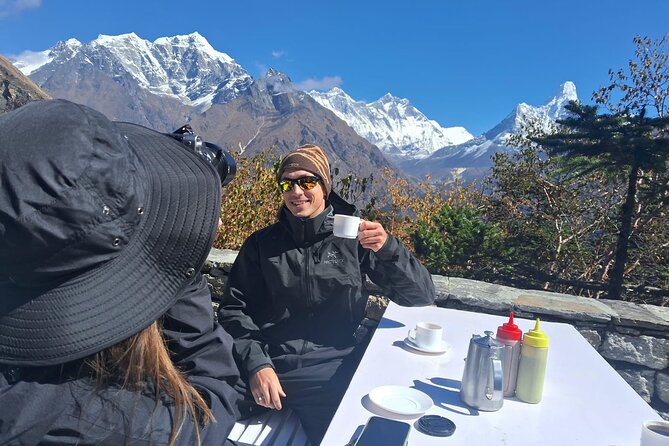
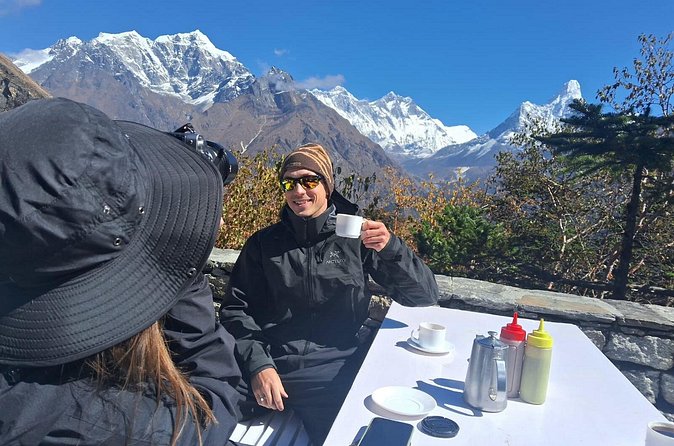
Day 5 Tengboche Gompa: monasteries, mountain angles, and crisp morning air
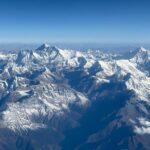
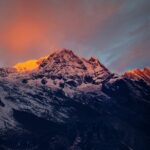
Today the route heads toward Tengboche Gompa. You’ll go early, following a cold breeze, and you’re given a list of dramatic sightlines—Everest, Nuptse, Lhotse, Amadablam, and other ranges—so you’re not walking blind. The monastery stop is a key cultural marker, and it’s also the kind of place that changes how you experience the mountains.
This stop works because it breaks the trekking monotony. You get a pause where the mountains feel close and the community feels real. You’ll also be in a good position for photos, since the plan includes viewpoints and time for scenic moments.
Potential drawback: Tengboche-area weather can shift fast. Layers matter here. If you’re underdressed, you’ll spend the morning shivering instead of taking in the views.
Day 6 short Tengboche visit, then Dingboche viewpoint day
This day begins with a short visit to Tengboche and its monasteries, then you trek onward toward the Dingboche viewpoint. The goal is another step up without throwing your body into full punishment.
What I like here is the balance. You aren’t just climbing; you’re getting small “stage wins” where the scenery keeps changing. The route is described as giving you a dazzling background of white mountains. Translation: you’ll likely be moving through a corridor of increasingly dramatic angles, and you’ll get time to notice what you’re actually looking at.
Day 7 Dingboche acclimatization: Chhukung hike to help your breathing
You stay in Dingboche for acclimatization. Then you hike to Chhukung through the Imja Khola valley, which is the kind of altitude test that’s designed to help you adapt. You also get standout views, especially of Lhotse, during the hike.
This is the day that can make or break your comfort later. Even if you feel good, follow the pacing your guide supports. The whole point of acclimatization days is to keep you functional. If you feel pressure to “power through,” resist it. Your body’s slow work up here is part of the deal.
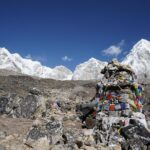
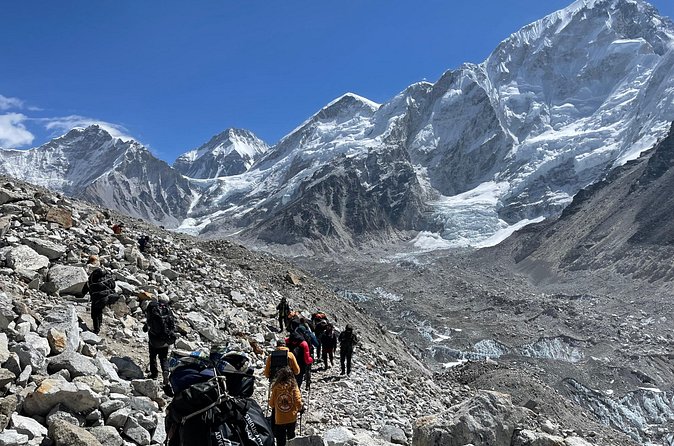
Day 8 Khumbu Glacier lateral moraine: memorials and the heavier feel of the day
From Dingboche, you continue on toward the Khumbu Glacier area, walking along the lateral moraine. The plan notes you’ll pass stone memorials for climbers who perished in summit attempts, which adds a sobering layer to what can otherwise feel like a pure adventure.
This day gets “real” emotionally. The glacier terrain and those memorial stones remind you why guides talk so much about weather, pacing, and going slow. It’s also a place where you may notice how trekking changes as you get higher: the air gets drier, your energy gets more expensive.
Practical consideration: bring good footing habits. Moraine paths can be uneven. Trekking poles can help, especially if your legs are tired.
Day 9 Everest Base Camp approach: Gorak Shep first, then the base camp trail
After breakfast, you march toward Gorak Shep, where the views are described as “sky-kissing” peaks. From there, you follow the trail that leads to Everest Base Camp. The plan includes time for the base camp experience, and since this is one of your headline days, it’s worth doing the simple things well: don’t rush, hydrate steadily, and keep your camera accessible.
Why this matters: base camp is not a simple “landmark.” It’s the culmination of many days of effort, and you’re also still dealing with altitude. I like that the trek gives you the two-stage feel: first Gorak Shep with sweeping views, then the final trail to the base camp area.
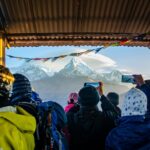
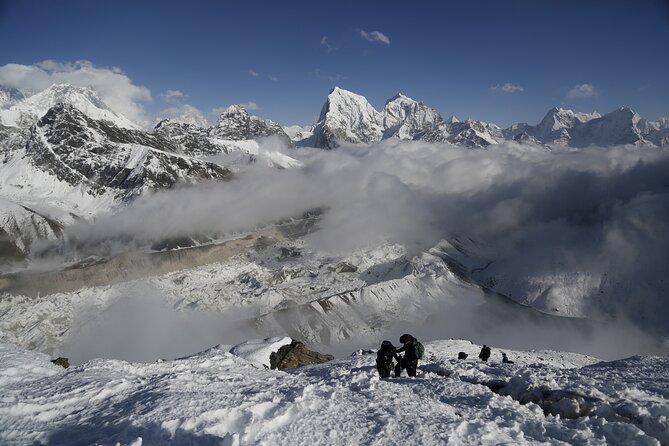
Day 10 Kalapatthar: the long early climb that pays off hard
Today is described as the “gist day,” and it follows a classic formula: you trek earlier to Kalapatthar, then watch sunrise-like light patterns as the sun pierces clouds and reflects off white snow. Expect a continuous ascent for hours before the viewpoint payoff.
This day is all about effort management. If you start too fast, you’ll feel it right away. If you pace, you’ll still be able to enjoy it when you reach the top.
This is also where I’d take the guide’s mindset seriously. On some departures, Buddhi has been praised for keeping the group supported and positive through tough stretches. Even if your guide isn’t Buddhi, the style you want is the same: encouragement plus smart pace.
Day 11 Pheriche to Pangboche: Orsho, then the oldest monastery stop
From Pheriche, the trek goes down slightly toward Orsho, then reaches Pangboche where you can explore the oldest monastery on the route. The plan mentions a belief that the monastery contains the scalp and bones of the abominable snowman—presented as local tradition. It’s one of those moments where folklore and geography meet.
This is also a quieter day compared to Kalapatthar. You’ll still be trekking, but the atmosphere shifts toward reflection and culture. The practical win: you get a break from the pressure of “the big view” days.
Potential drawback: monastery stops can be chilly and require careful layering. Bring gloves or at least something to protect your hands, since cold mornings can cut through.
Day 12 Return toward Lukla: easier walking, but still not a free day
From Namche, the plan returns you back to Lukla. You reach Lukla earlier, which gives you leisure time to explore the Lukla valley, then you stay overnight at a guesthouse.
This is a good day to reset. Your body still feels altitude effects, but the route is generally descending from the higher zones you’ve already crossed. If you’re the type who gets restless when resting, this is where the extra hours matter—you can take it slower without feeling trapped.
Keep expectations realistic: “earlier arrival” doesn’t mean “no walking.” You’ll still want to pack for wind and cold and keep your daily routine steady.
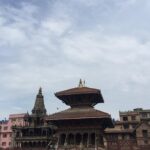
Day 13 Kathmandu sightseeing: Durbar Square and a final mountain mindset shift
After your Lukla-to-Kathmandu travel, you’re back in the capital within a few hours. Then you visit Kathmandu Durbar Square, described as a panoramic and magnificent view spot for the Kathmandu valley.
This day works as a transition. The mountains are behind you, and you’re now adjusting to crowds, traffic, and warmer air. It’s also a good time to do practical tasks like laundry pickup or SIM arrangements—if you can find energy after the trek.
Day 14 final farewell and TIA timing
Your last day includes a night rest in Kathmandu, then you pack and head to TIA. You’re asked to be at the airport 3 hours before the flight, and there’s also mention of a small farewell program organized by Nepa-related team members.
Timing matters here because the trek ends fast. If you like to keep things orderly, use this day to plan the airport run, confirm your departure details, and avoid last-minute shopping that eats into buffer time.
Price and value: what $1,799.27 covers (and why the totals can surprise you)
At $1,799.27 per person for a roughly 14-day trip, the headline question is value. The good news is that the price isn’t just “guiding.” It includes a lot of high-cost logistics:
- Both way flights (Kathmandu–Lukla–Kathmandu)
- Permits and fees, including Sagarmatha National Park permit and Khumbu entrance, plus Pasang Lhamu Rural municipality entrance
- Meals across the trek (the package lists 12 breakfasts, 12 lunches, 11 dinners)
- 11 nights accommodation on the trek
- Essential gear: sleeping bag, down jacket, and duffel bag
- Airport pickup and drop for domestic and international transfers
- A medical kit box
- Three cups of hot tea during the trek
- Emergency helicopter service arrangement that’s paid through your travel insurance company
So you’re paying for the whole operating system: transport, permits, and core survival items. That’s a big deal in the Everest region where DIY planning often creates expensive gaps.
What you should budget separately: travel and rescue insurance (explicitly not included), Kathmandu hotel nights, plus porter cost and tips for the guide and porter. Those can change your final out-of-pocket total, so don’t wait until the last minute to estimate.
If you want a simple rule: compare this price to other treks, then add the cost of missing pieces (insurance, porter/tipping, Kathmandu lodging) to see your true bottom line.
Fitness, weather, and the one drawback you can’t wish away
This trek is rated for people with a strong physical fitness level and it’s clearly built around sustained hiking days with altitude exposure. The itinerary includes multiple uphill pushes, plus a demanding viewpoint day, so it’s not ideal if you’re new to multi-day trekking.
Weather is also a real factor. The experience requires good weather, and if it’s canceled due to poor conditions, you’re offered another date or a full refund. That’s fair, but it still means your dates need flexibility.
My other “watch this” item is carrying costs and comfort basics. The package includes major gear and meals, but it explicitly does not include phone call/laundry/battery recharge/hot water/shower extras, and water bottles are also not included. In practice, you’ll spend more if you try to live like you’re at a home hotel.
Should you book this Everest Base Camp trek?
Book it if you want the Everest Base Camp goal with organized logistics, gear provided, and a guided pace that respects acclimatization. If you like culture stops (Tengboche, Pangboche) and you want the big viewpoint payoff at Kalapatthar, this fits your plan.
Hold off or ask more questions if you’re trying to keep costs ultra-tight, you don’t have travel/rescue insurance sorted, or you’re not ready for a physically serious trek with changing mountain weather. Also, be honest about how you handle cold mornings and long climbs.
If your priority is an experience that feels well-run from the Lukla flights to the final Kathmandu farewell, this one looks like a strong match.
FAQ
How long is the Everest Base Camp trek?
The trek runs for 14 days approximately.
What is the meeting time?
The start time is 8:15 am.
Are flights between Kathmandu and Lukla included?
Yes. The package includes both-way flight tickets (KTM–Lukla–KTM).
What gear is provided?
The tour provides a sleeping bag, down jacket, and duffel bag.
Are meals included?
Yes. The package includes 12 breakfasts, 12 lunches, and 11 dinners.
Does the price include permits and park fees?
Yes. It includes the Sagarmatha National Park permit and Khumbu entrance fee, plus Pasang Lhamu Rural municipality entrance fee.
Is emergency evacuation included?
An emergency helicopter service arrangement is included, but it is paid by your travel insurance company.
Is Kathmandu lodging included?
No. Hotel in Kathmandu is not included.