REVIEW · KATHMANDU
Everest Three Pass Trek
Book on Viator →Operated by Base Camp Adventure Pvt. Ltd. · Bookable on Viator
Three snow passes in the Everest region is serious business. This trek strings together Kongma La, Cho La, and Renjo La with classic Khumbu villages, big acclimatization moments, and some of the most dramatic Himalayan views you’ll ever see.
I like the way this route builds your day-to-day rhythm for altitude: river valleys early on, a real Namche acclimation stop, then a careful jump to Chhukung before you tackle Kongma La. I also like the practical package—an English-speaking guide, porters, national park paperwork, and even a down jacket + sleeping bag provided—so you’re not scrambling for gear or paperwork mid-trip. The main drawback: you need strong fitness and a solid head for rough, steep, often icy/snowy terrain, especially on the pass days.
In This Review
- Key highlights you’ll actually care about
- Three Pass Trek: what makes this route feel different
- Kathmandu mornings and the Lukla start you can’t ignore
- Dudh Koshi to Namche: river crossings and first altitude work
- Tengboche to Dingboche: prayer wheels, rhododendron, and big-wall views
- Chhukung and Kongma La: short lead-in, steep payback
- Gorakshep and Kala Patthar: where sunrise becomes a workout
- Cho La to Gokyo lakes: an ice-covered pass and a different kind of scenery
- Renjo La to Namche: your last pass, then an easier rhythm
- Back to Kathmandu: flight day is still part of the adventure
- Price and logistics: does $1,800 feel fair for this kind of trek?
- Service you can feel: private guiding and what the operator is known for
- Fitness, weather, and the passes that set the terms
- Should you book Everest Three Pass Trek?
- FAQ
- What permits are included on the Everest Three Pass Trek?
- Are domestic flights to Lukla included?
- What gear does the tour provide for the trek?
- What meals are included?
- What should I bring since it is not included?
- What happens if the experience can’t run due to poor weather?
Key highlights you’ll actually care about
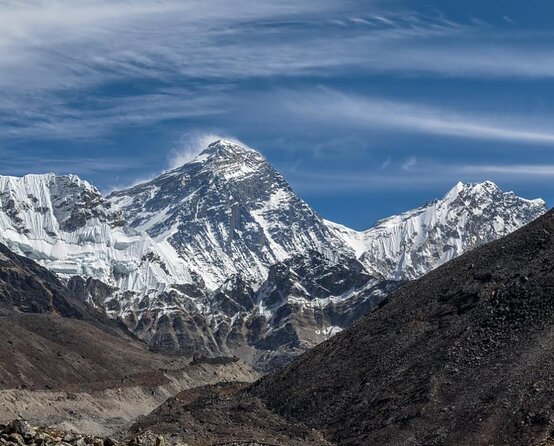
- Three high snow passes: Kongma La (5535m), Cho La (5420m), Renjo La (5360m) with big views across the Mahalangur Himalaya.
- Lukla fly-in/out: domestic flights are included, saving you time and stress before the first trek day.
- Acclimatization built into the schedule: Namche + Dingboche-style altitude pacing, plus Gokyo Ri and two rest/adjustment days.
- Known viewpoint payoff: Kala Patthar sunrise is timed as an early morning mission.
- Guesthouse trekking that stays organized: “best available” places, twin sharing, meals planned, and staffed support.
- Private group: only your group participates, which usually means fewer delays and less waiting around.
Three Pass Trek: what makes this route feel different
The Everest Three Pass trek is the kind of trip where you earn every view. Instead of sticking to a single main valley, you cross three snow-covered passes—Kongma La, Cho La, and Renjo La—each at over 5300 meters. That means more steep climbs, more high-altitude weather exposure, and more “pay attention to your feet” hiking.
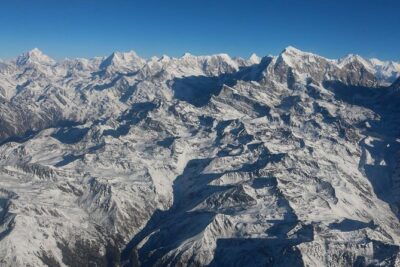
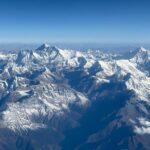
Here’s the good part: every pass gives you a fresh angle on the Khumbu Himalaya. You get repeated sightlines toward the Mahalangur Himalayan Range, including Everest (8848m) and other heavy hitters like Ama Dablam and Lhotse when the weather is cooperative. It’s not just about reaching high points—it’s the variety of terrain and directions you travel.
The trek also has the classic Khumbu texture: prayer flags, suspension bridges, Sherpa villages, and tea-house style guesthouses. So yes, it’s hard. But it’s also very “real Nepal trekking,” not a drive-through scenery tour.
You can also read our reviews of more hiking tours in Kathmandu
Kathmandu mornings and the Lukla start you can’t ignore
Your trip begins in Kathmandu, with a meeting time of 6:15 am at BASE CAMP ADVENTURE PVT. LTD., Tridevi Sadak. The tour includes pickup offered, and the office is near public transportation, so you’re not hunting all over town with sore legs before day one.
Domestic air is a big part of the experience here. The trek includes flights Kathmandu → Lukla → Kathmandu, plus airport tax, which matters because Lukla access is tightly tied to weather and flight schedules. If you’re the kind of person who hates uncertainty, you’ll still want to accept that mountain air can be fickle.
When you land at Tenzing-Hillary Airport in Lukla, you get an aerial warm-up: flying above lush hills and snow-capped peaks is a preview of what you’re signing up for. It’s a short step from “city life” to serious altitude country.
Dudh Koshi to Namche: river crossings and first altitude work
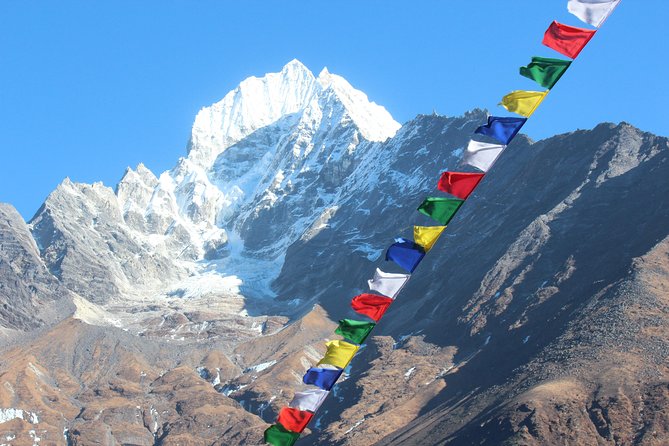
Day 2 is all about the Dudh Koshi River and its suspension bridges. The trail follows the river while you cross it multiple times on bridges strung with prayer flags. It’s a great early-day intro because it keeps things moving without tossing you immediately into the highest passes.
Then you enter Sagarmatha National Park, which adds a sense of place and protection to the trip. You’ll feel that shift in the way the trail is managed and the way the region opens up around you.
On Day 3, you get a real rest/acclimatization day in Namche. This is one of the best value stops on the whole route because it’s not just “standing still.” You’ll explore the Sherpa town and hike a bit uphill to Everest View Hotel, where you can pick out peaks like Nuptse (7861m) and Thamserku (listed as Thams…) along with other surrounding giants when visibility is good.
Possible drawback: early on, that river walking + bridge crossings can add fatigue to your legs. It’s manageable, but it’s smart to treat Day 2 as a foundation day, not a speedrun.
Tengboche to Dingboche: prayer wheels, rhododendron, and big-wall views
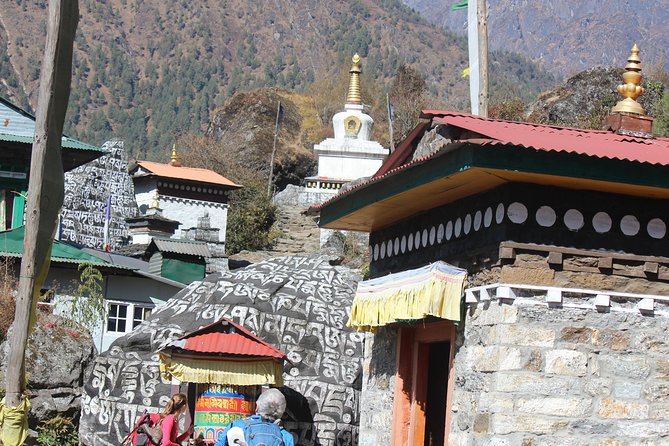
Day 4 follows the river upstream, starting with water-driven prayer wheels near Phunke Tenga, then lifting you toward Tengboche. You hike above Imja Khola for a while, which gives you that classic “valley up high” trekking feel—more air, more exposure, and more sweeping views when clouds break.
Tengboche is a strong mid-trek anchor. Even without getting overly religious about it, this stop fits the Khumbu tradition: village life, monastery culture, and the sense that you’re moving through a living Himalayan community.
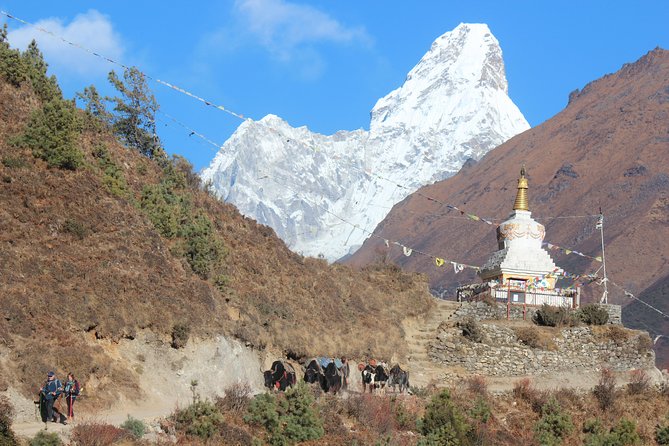
Day 5 continues your altitude climb to Dingboche. You’ll pass through rhododendron forest, which helps break up the stone-and-ice monotony mentally. The view payoff here is major: Ama Dablam (6856m), Lhotse (8414m), and Everest (8848m) can appear as you’re trekking into the more barren, high-altitude zones.
Why this matters: Dingboche is a useful “in-between” stop before the highest pass effort. It’s the kind of day where your body adapts even when the trail looks tough on paper.
Chhukung and Kongma La: short lead-in, steep payback
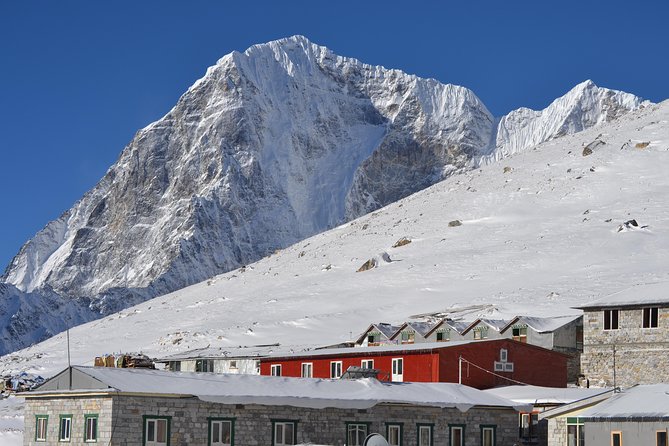
Day 6 is shorter than many people expect. Instead of staying longer in Dingboche, you move to Chhukung to avoid a long walk the day before you cross Kongma La. That planning choice is practical: it reduces unnecessary fatigue so you can spend more energy where it counts—on the pass.
Day 7 is your first major crossing: Kongma La (5535m), the highest of the three. The route to the top is described as steep uphill with difficulties, and since you’re at high altitude, you’ll feel every switchback. This isn’t the day to “save energy for later.” You’ll need steady pacing from the start.
Practical tip mindset: treat Kongma La like a slow technical hike. You’re not just climbing height—you’re managing breath, footing, and confidence on rocky or snow-covered ground.
Gorakshep and Kala Patthar: where sunrise becomes a workout
Day 8 pushes you toward Gorakshep. This is a rewarding walk with mesmerizing views of snow-capped peaks and glaciers. The trail is generally described as stony, so your job is to keep your footing calm and your stride efficient.
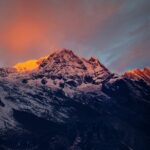
Day 9 is the classic early-morning mission: hike up to Kala Patthar (5550m) for sunrise. You’ll get breathtaking views of valleys as the first rays of sun hit Mt. Everest (8848m). It’s one of those moments that makes the hard days worth it, but it’s also physically demanding—because you’ll be moving in cold, early conditions at high altitude.
If you’re the type who hates waking up early, remind yourself: you’re not doing it for fun. You’re doing it for a very specific reward.
Cho La to Gokyo lakes: an ice-covered pass and a different kind of scenery
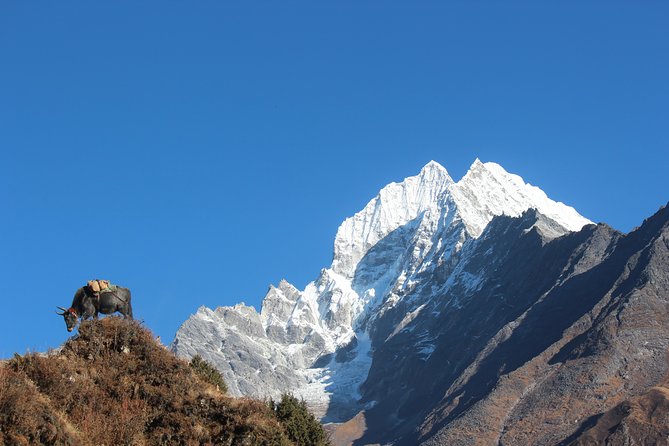
Day 10 brings the toughest kind of climbing: the second pass, Cho La (5420m), to reach Gokyo lakes. The itinerary highlights an ice-covered trail and a steep uphill climb to the top of Cho La. Expect this to feel more technical and slower than the lower-elevation days—because ice changes everything.
Then you land in Gokyo, which gives the trip a fresh rhythm. Instead of just more stone and trails, you get the big visual shift toward lakes and open sky views.
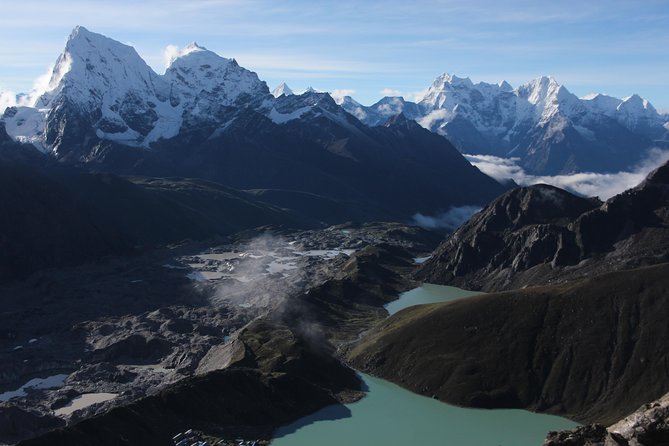
Day 11 is a rest day in Gokyo. You hike to Gokyo Ri (5360m), a small mountain above the village, in the morning. The goal is clear: views of the entire Gokyo valley and its many lakes, plus the broader mountain scene when clouds cooperate.
Value of this day: you recover while still doing something active. It’s the right kind of “rest,” the kind that keeps you from stiffening up too much.
Renjo La to Namche: your last pass, then an easier rhythm
Day 12 is the third and last pass: Renjo La (5360m). You start early and hike gradually on a snow-filled path to the top. From Renjo La, you get enthralling views of nearby high peaks, including Cho La in the direction of the earlier crossing.
After you crest Renjo La, the trip shifts from “pass mode” to “descent into life.” That’s psychologically important. After three high efforts, it helps to know you’re moving back toward villages.
Day 13 returns to a more relaxed schedule: trekking back toward Namche on a relatively easier trail. You can enjoy the surroundings and get distant views of Everest and other mountains without the same intense pass-day workload.
Day 14 finishes the trek section by walking from Namche to Lukla, crossing villages, forests, and rivers over suspension bridges. Then you rest in Lukla and explore the market, which is a real morale boost after a week-plus of repetitive trail routines.
Back to Kathmandu: flight day is still part of the adventure
On Day 15, you fly from Lukla back to Kathmandu early in the morning. The itinerary mentions seeing snow-capped mountains and lush green hills during the flight, which is a pleasant visual wrap-up.
Once you arrive in Kathmandu, you’ll have time to settle back in. Your trip plan includes time to feel human again—shower options vary, but the big win is getting off a mountain clock and back onto city time.
This is when it’s smart to slow down. After three high passes and long days, you’ll appreciate even simple comforts.
Price and logistics: does $1,800 feel fair for this kind of trek?
At $1,800 per person for roughly 15 days, the price isn’t low. But it’s not random either. What you’re paying for is a lot of moving parts that are expensive or annoying to manage yourself.
Included is the backbone of a serious trekking operation:
- Trek guide (local government licensed, English speaking)
- Porters and staff to carry luggage
- National park entry permit and TIMS permit
- Domestic flights Kathmandu–Lukla–Kathmandu and airport tax
- Guesthouses as “best available,” mainly twin sharing
- Meals: 14 breakfasts, 14 lunches, 14 dinners (as listed)
- Key cold-weather gear: down jacket and sleeping bag, plus a duffel/kit bag that you return after the trek
- First aid medical kits and support for staff
Here’s the practical take: permits + guide + support staff + Lukla flights + insulated gear make a big difference in total cost and stress. If you had to price these separately, the math often feels less friendly than the package rate.
What’s not included also matters. You’ll pay extra for international airfare, and you’ll also need your personal trekking equipment. Alcohol, laundry, and drinks aren’t covered, and you should budget for tips for trekking staff since those are not included.
So the value question comes down to this: if you want maximum time trekking and less time organizing, this package looks like a good fit.
Service you can feel: private guiding and what the operator is known for
This is listed as a private tour/activity, meaning it’s only your group. That’s not just a marketing word. In a trek like this, less crowd friction can mean fewer pace conflicts and less waiting at key junctions.
The operator is Base Camp Adventure Pvt. Ltd., and the provided feedback highlights a few strengths that matter on Everest routes:
- Guides who explain places clearly and keep you oriented
- Good organization around the Kathmandu days before and after the trek
- A focus on timing to help manage weather conditions, like starting early to avoid late monsoon rain patterns on earlier Everest itineraries
- Solid teamwork, including guide/shorthand pairings such as Nabracht with sherpas Bhim and Ram, and other named guides like Shiva and Jwala
Even the food details show up: the typical Kathmandu treks food such as dal bhat is mentioned as part of the arranged meals in some Everest experiences with the same provider. That small point is useful for real planning—when meals and lodging are handled, you spend your energy where it belongs.
None of this replaces your own judgment. But it does suggest you’re not stepping into chaos.
Fitness, weather, and the passes that set the terms
This trek is described as among the most challenging adventures in the Khumbu region because of the three snow-covered passes and rough terrain. That means your training plan matters more than your daydreaming.
Plan for:
- Steep uphill effort on multiple days
- Snow/ice conditions on pass routes like Cho La
- Cold mornings, especially the Kala Patthar sunrise day
- Mental focus at high altitude, where slow progress is normal
Weather is also a gatekeeper. The experience requires good weather, and the included domestic flight connection is naturally weather-sensitive. If weather cancels things, you should be prepared to adjust dates rather than assume fixed-day certainty.
If you’re in doubt about fitness, be honest. The best trekking trip is the one where you’re safely tired from effort—not dangerously wiped out from poor pacing.
Should you book Everest Three Pass Trek?
Book it if you want a true Everest region challenge with three high pass crossings, planned acclimatization stops, and an organized support team that handles permits, domestic flights, and core gear. This is a good match for hikers who can walk uphill for long stretches and who don’t mind cold mornings and occasional technical footing.
Don’t book it if you’re looking for a gentle walk with optional effort. This route is tough by design, and the pass days are the main event. Also, if you’re not comfortable with the reality of weather and possible date changes, consider a less time-sensitive itinerary.
If you’re ready for hard hiking and want the kind of trek where every day has a reason, this one makes a strong case for your shortlist.
FAQ
What permits are included on the Everest Three Pass Trek?
The package includes a National Park entry permit and a TIMS permit (Trekker’s Information Management System).
Are domestic flights to Lukla included?
Yes. Domestic airfare (Kathmandu–Lukla–Kathmandu) and airport tax are included.
What gear does the tour provide for the trek?
The tour provides a down jacket, a sleeping bag, and a duffel/kit bag (the bag needs to be returned after the trek).
What meals are included?
Breakfast, lunch, and dinner are included for 14 days each (as listed).
What should I bring since it is not included?
The tour states that personal trekking equipment is not included, so you’ll need to supply your own essentials.
What happens if the experience can’t run due to poor weather?
The experience requires good weather. If it’s canceled due to poor weather, you’ll be offered a different date or a full refund.